Few people on the planet (if any) have put more time and energy into understanding and improving static line BASE jumping than the team at Apex BASE. Born and raised among the low objects of Southern California, static line is a common deployment type in our area and we’re committed to advancing static line techniques and equipment.
For some foundational static line knowledge, check out this video for the basics: rigging techniques, break cord info, dos and don’ts, testing, etc.
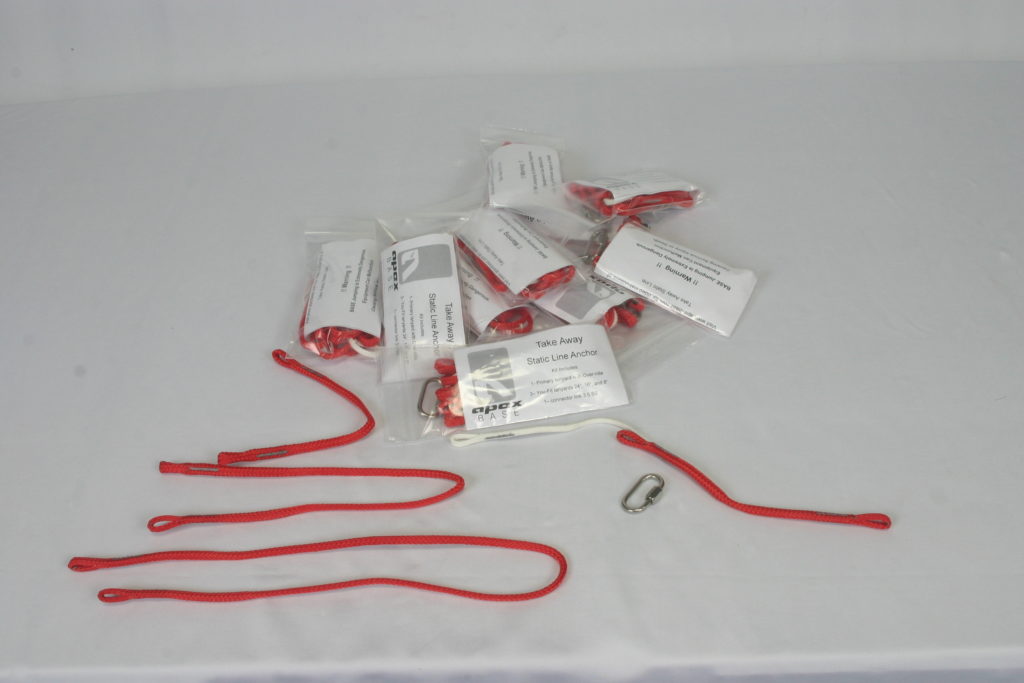
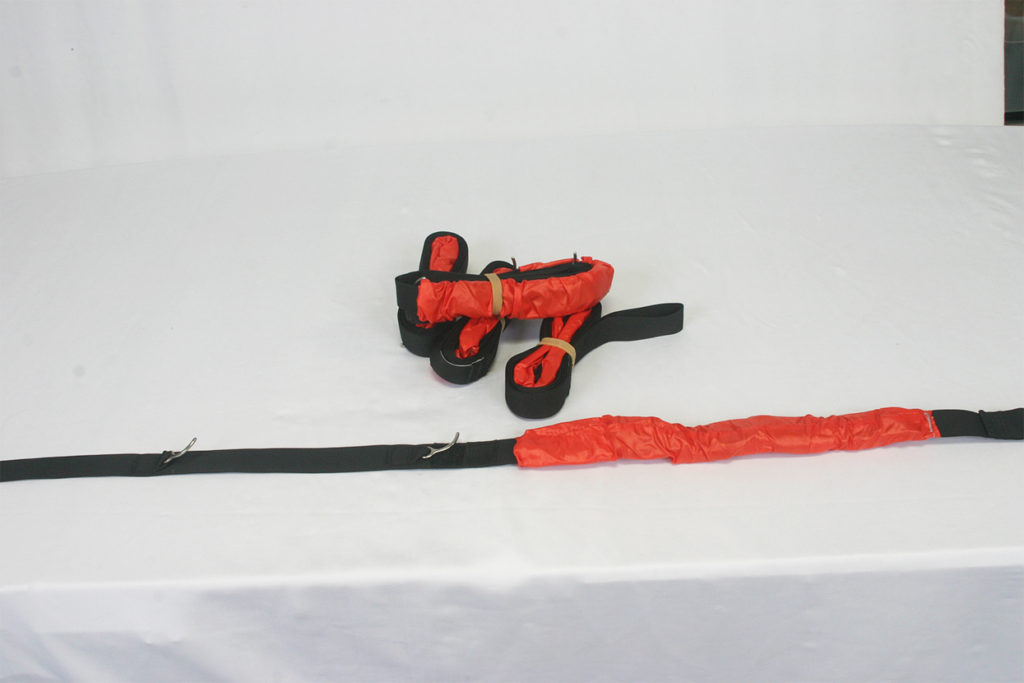
The attention we’ve given these “low and below” jumps has spawned a few pieces of equipment which can make these jumps a little easier on you, easier on your gear, and a little safer. These components can be used individually, together as a complete system, or mixed and matched to meet your personal needs.
Starting from the anchor (an adequately strong tie in point affixed to the object itself), and working our way down:
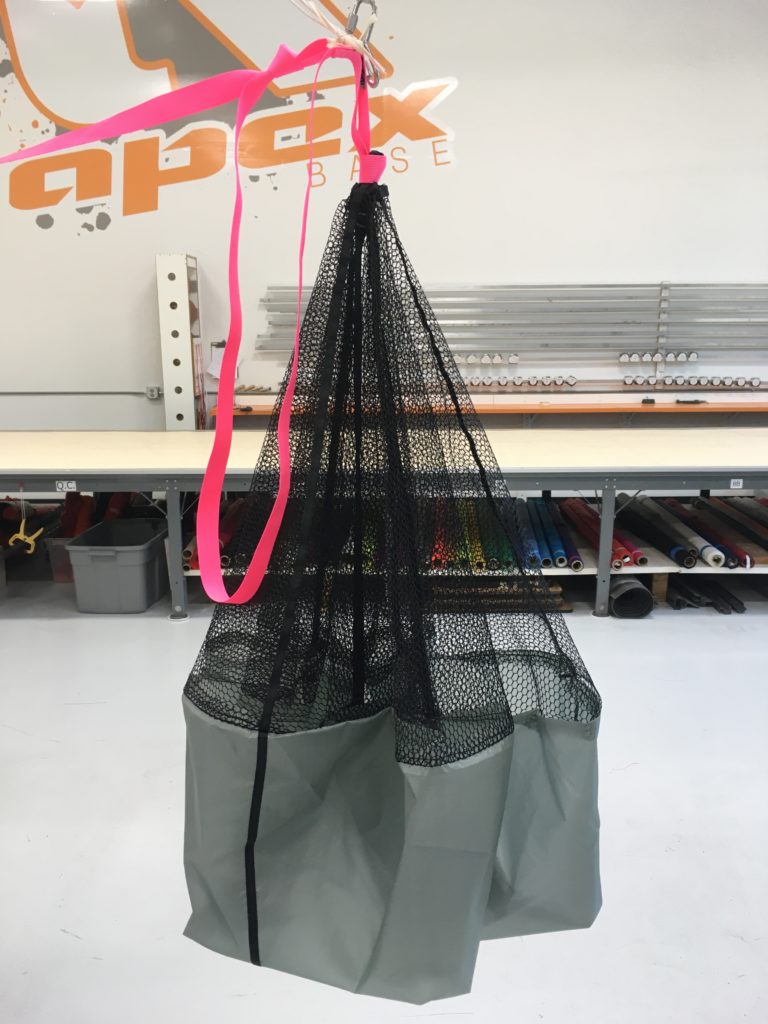
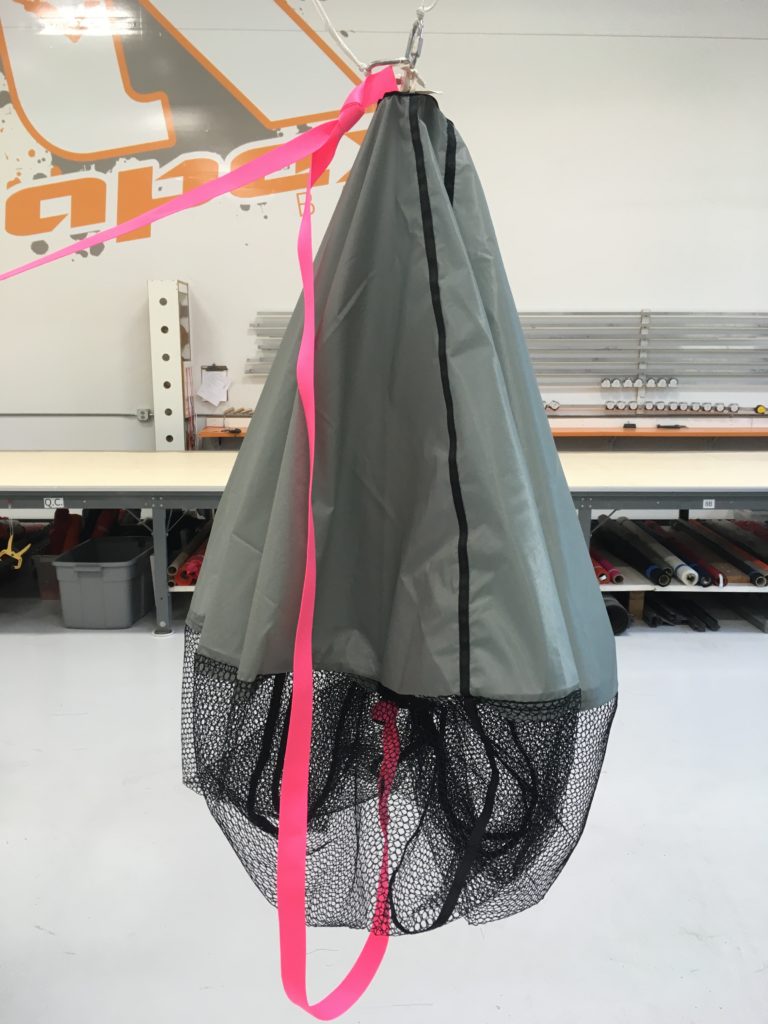
Take Away Static Line System
This Takeaway System serves two purposes:
- Allows you to do the majority of your static line setup at home, in good light, and without stress.
- Prevents any evidence from being left at the exit point.
By using this system you’ll arrive at the exit point completely prepared for your static line jump. Just open the hard link, properly connect the system to the exit point anchor, and you’re good to go. Watch this video to see how it works:
It might look a little complicated on video, but we promise that once you handle this system it is quite manageable, and easy to use. The use of this system is taught by BASE schools around the world. More info on this system HERE.
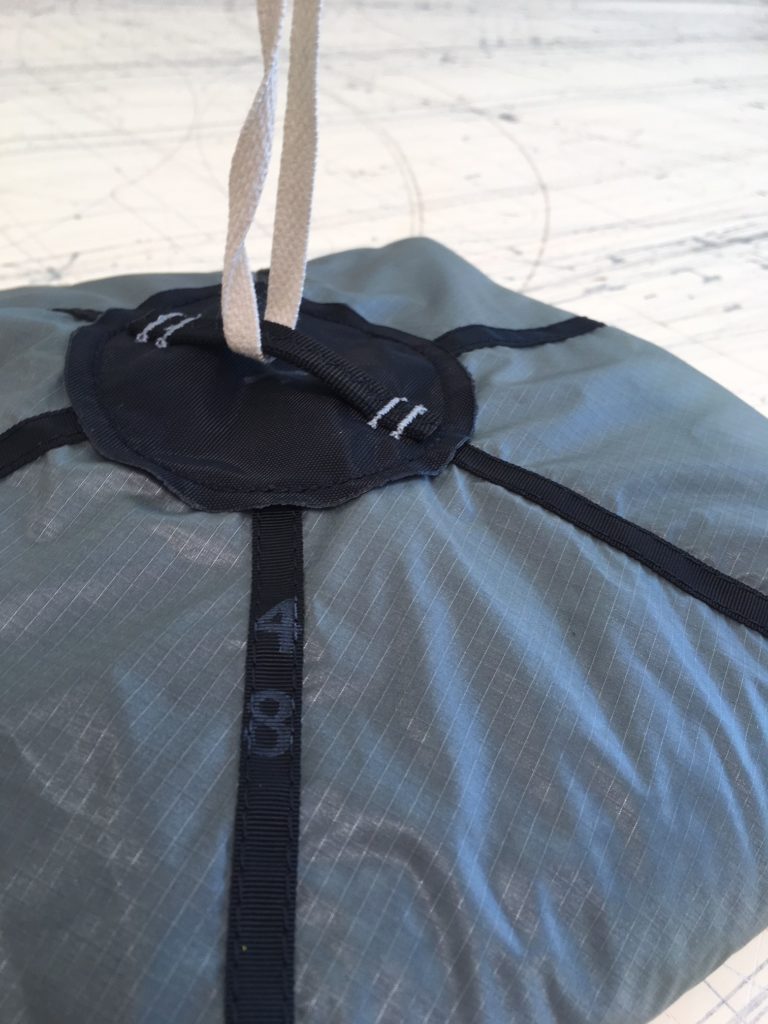
48” PC with Static Line Attachment Point
Most jumpers use two pieces of break cord, at two different locations along the bridle, to tie into the exit point anchor. The first piece is your primary, and is generally attached to a knot at the center point of the bridle (halfway between the bottom pin and PC attachment loop). The second piece of break cord is attached to the PC attachment loop and used as a back-up in case the midpoint piece fails.
We like the idea of moving that secondary piece from the PC attachment loop to the apex of the PC (as pictured above) for three reasons:
- It reduces wear on your bridle, which can be damaged by static line deployments.
- By tying to this point your PC will be in the proper “right side up” deployment position when it is pulled away from the object. This is as opposed to it being upside down when using the PC attachment loop. Setting the PC in the proper orientation at exit will make it a much more effective, and fast, backup in the event that your break cord fails prematurely. There is no advantage to starting an unintended freefall with an upside down PC.
- With the PC tied in at the apex it is less susceptible to winds than a PC that is loosely hanging from the object.
Secondary break cord tied at PC attachment point, leaving PC oriented upside down.
Secondary break cord tied at PC apex, leaving PC oriented correctly.
This attachment point is only available on 48” PCs, as it’s the most common size “emergency PC” used during these low jumps. The 48” PC with Static Line Attachment Point is not excluded from use during free fall delays, and can be used in any situation where a standard 48” PC would be appropriate. More info on this PC HERE.
Static Line BASE Jumping Bridle
A serious risk during static line jumps is premature failure of your break cord. This can lead to unintended freefalls on low and technical objects. Break cord can fail due to the high dynamic forces that occur when your bridle first comes under tension, pulling the weight of your canopy off your back. To do its job properly your break cord must be able to withstand this first shock, holding all the way to line stretch.
By using a shock absorbing bridle, these forces are more easily withstood by your break cord ensuring that it won’t fail until it’s intended to. See exactly what we mean, here:
The Static Line Bridle incorporates a continuous piece of webbing which means if the shock absorber section ever fails (which has never happened to our knowledge) the bridle will still function safely, as normal. This bridle has also been safely used on free fall jumps, skydives, and wingsuit jumps. More info on this bridle HERE.
Static Line BASE Jumping Bridle – Optional Tie Off Points
Primary loop at the midpoint of the bridle, where most jumpers would place a knot to tie in to the exit point anchor.
Secondary loop tucked into the PC attachment loop.
As discussed above and in the “static line setup” video, Apex BASE recommends tying break cord at two sections:
- Your bridle midpoint.
- Either your bridle attachment loop, or PC apex loop.
Static Line Bridles from Apex BASE can be affixed with two optional loops at these points specifically designed as tie in points for break cord. By using a bridle with these loops you prevent wear from occurring on the bridle itself. These loops can be replaced by a local rigger when they wear out, making this option ideal for jumpers who find themselves static lining frequently.
***IMPORTANT***
We are aware of one gear combination, if being used during a rare emergency, which can create a problem. We believe that this scenario is highly unlikely, but it is possible so we feel it’s important to make jumpers aware. The best way to illustrate this scenario is by setting the scene:
You are approaching a static line exit and using the following two pieces of equipment:
- Take Away Static Line System
- 48” PC with Static Line Attachment Point
The bridle being used in this case is not important, but it is important to note that you are tying your break cord at the bridle midpoint, and at the top of the PC at the apex tie in point.
You’ve got your Take Away system rigged up properly, but not attached to the anchor at the exit point. But before you’re able to connect to the anchor, you accidentally fall off the object. It’s about to become a bad day…because you’re in free fall with your PC tied, upside down, to the midpoint of your bridle. We are not confident that your canopy would extract in time to save you in this case.
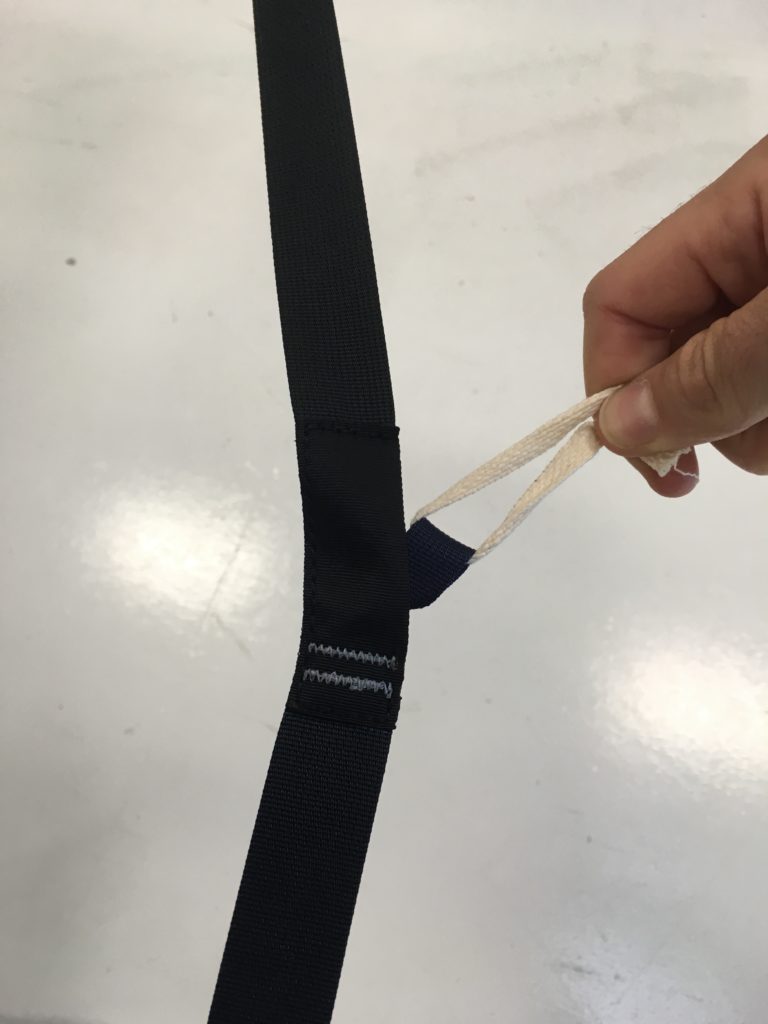
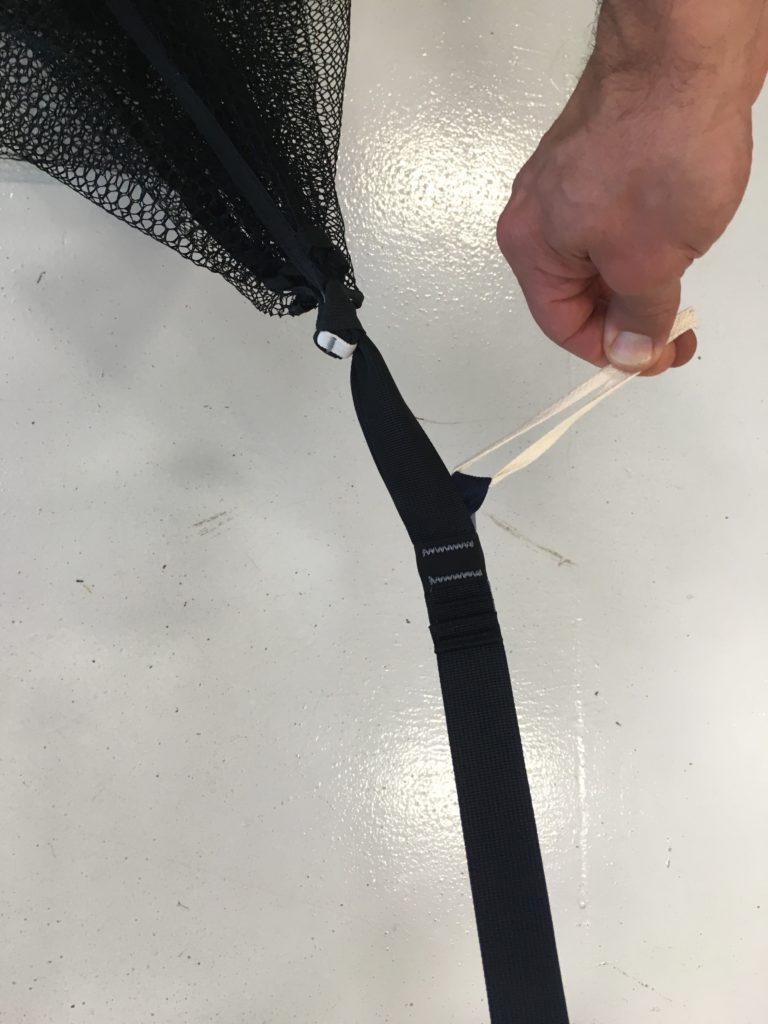
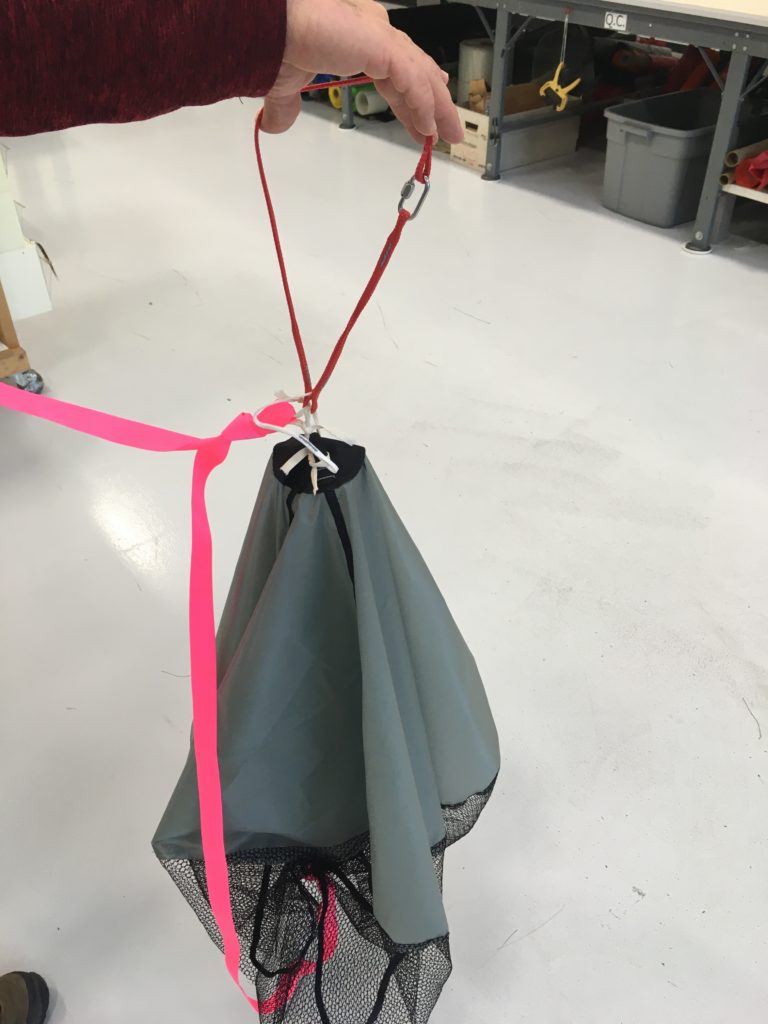
The photo below shows how the Takeaway System links the top of the PC to the midpoint of the bridle, which is problematic if you exit the object, accidentally, before attaching your Takeaway System to the exit point anchor. In this photo, you can imagine that the hand is taking the place of the anchor. If the Takeaway System is not closed around this “anchor,” you’ve got a short bridle with an upside down PC.
If instead of tying into the top of the PC at the apex you chose to tie to the PC attachment loop at the base of the PC, things MIGHT end up different. In this case the bridle length would effectively be reduced to half, but at least the PC would be in the correct orientation. In this case, we can speculate that your parachute would be more likely (but not at all certain) to extract in time to save you.
Are you having a hard time picturing this scenario? Yeah, us too. Hopefully the photo can clarify for you and if not, do not hesitate to give us a call. We’ll be happy to elaborate on this point.
Bottom Line: This situation can only occur with a specific combination of gear (PC with Static Line Attachment Point + Take Away Static Line System), used in a certain manner (tying to the bridle midpoint and PC apex loop), at a certain point in time (after you have rigged up the Takeaway System, but before you connect to the exit point anchor), and would require an unintentional fall from the object. It goes without saying that falling off an object by accident is dangerous, falling off a low object by accident is even more dangerous, and falling off a low object by accident while rigging a static line is pretty much a total disaster. All that said, this very specific set of circumstances is within the realm of possibility so we would like static line jumpers to understand it, however unlikely.
Have questions/comments/concerns? Reach out to us! We would love to chat static line techniques and technology with you!